PAul wanted me to send the pistons back, fair enough, but it would just taake too much time.
I am in a hurry to tighten the heads and be done with the rebuild.
I met a Swiss gent over the Internet through The FAM forum (german- and member-only, don’t start complaining if you’re not drawing new blood to the scene), Walter Bachmann, who also has a T250, although a 1972. Sent him the pistons and a few more parts, that recouped my expenses a bit.
Waiting for the news set from PM.
Is king of of his realm: I received his set of pistons today, we’re ready to rebore… But am I still waiting for Marcel’s parts!
I was never impressed by the Dutch Post efficiency BUT this is getting unreal. You can order parts from the USA 5 days later than in Europe and have them delivered before the Euro parts even appear on your door steps…
I just dismantled the rear wheel to advance while waiting for parts to arrive. Sprocket carrier was grotty but, once cleaned, show correct finish for the rest… much shinier than what I thought, even with clear coat on top. So I started stripping the other bits with paint stripper instead of beads, much slower but the ally surface remains untouched… maybe I don’t like polishing after all!
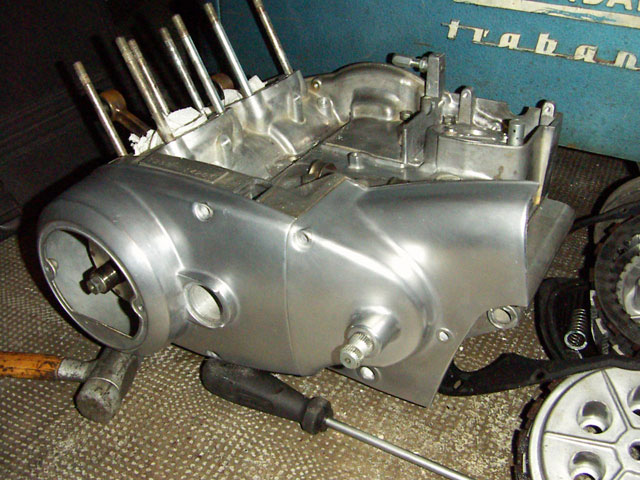
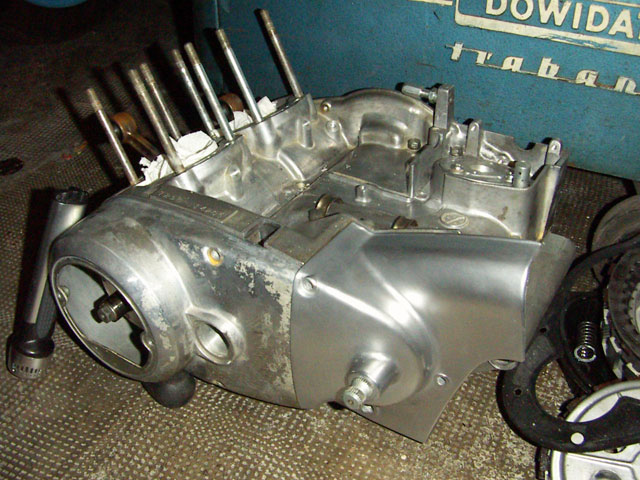
Next day, being very happy with myself, I decided to atack the second case… the iggy case.
Of course, I couldn’t rememebr what I did, so whent that way:
Clean part
Beadblast
Polished with steel pad (without washing)
Washed with steel pad
Polished by hand with soft cloth
Then rehit it with steel pad
then rewasahed it…
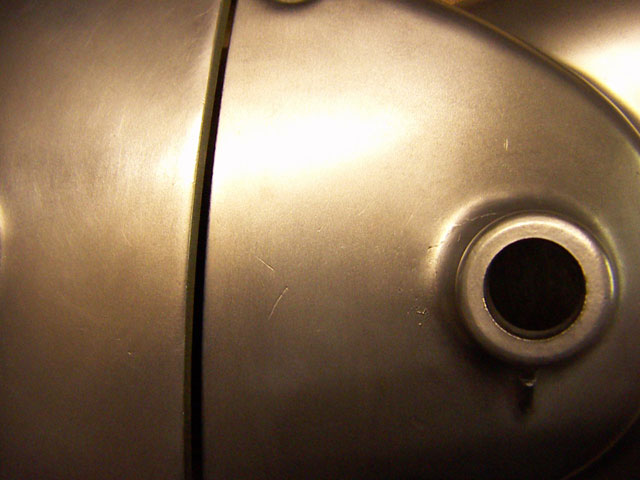
The bugger hasn’t got the same color!
This is the original untouched cover, I’m pretty sure that clearcoating the beadblasted part will get me close to this look.
The surface up close. They have the same finish but the colors are different…
Oh well, there’s always tomorrow…
IF, like me, you ride through winter this will certainly happen:
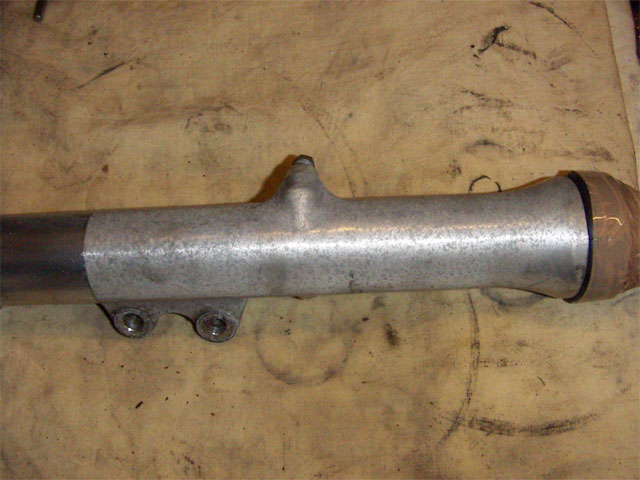
Thanks to the upcoming MOT and a blown forkseal, it was time to tackle the job. Yamaha forksliders have a very specific texture, as if they had been sanded on a lathe. I stopped short of reproducing that, but as you’ll see it gets quite close.
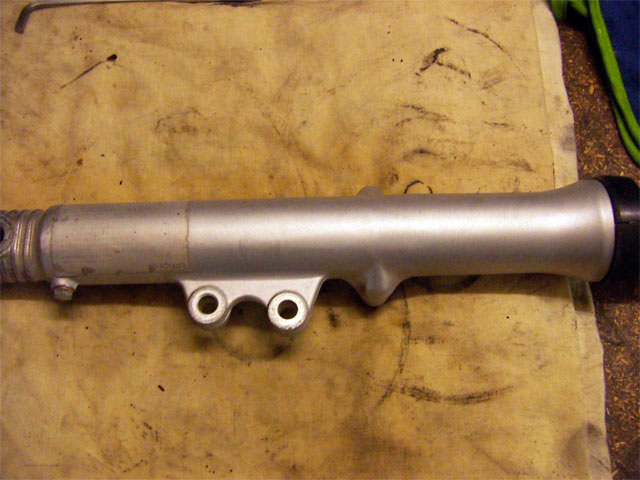
This is after beadblasting with glass beads. You first have to clean the part of all dirt and grease.
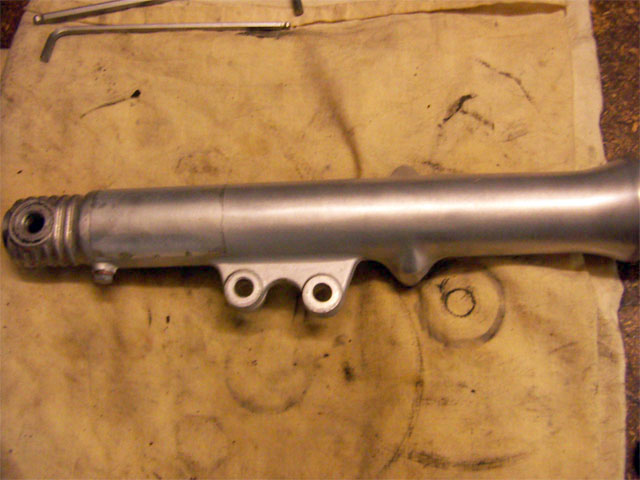
And this after cleaning the beadblasted parts undr running water and using a steelwool pad. I use one designed for crockery and pots, because it’s got soap integrated. I did only one run with the pad, and by the look of things if you were to use something harsher/harder after you’ll arrive at the original polished-but-not-shiny-with-marks-look.
Don’t forget to wash the part in Gunks with thin spiral brushes in all the holes! Otherwise you’ll hear the familiar crunch of glass beads when you tighten your bolts…
Not bad for only a half-hour job…and it could be even better! I just didn’t have the time to play with it any longer.
IF, like me, you ride through winter this will certainly happen:
Thanks to the upcoming MOT and a blown forkseal, it was time to tackle the job. Yamaha forksliders have a very specific texture, as if they had been sanded on a lathe. I stopped short of reproducing that, but as you’ll see it gets quite close.
This is after beadblasting with glass beads. You first have to clean the part of all dirt and grease.
And this after cleaning the beadblasted parts undr running water and using a steelwool pad. I use one designed for crockery and pots, because it’s got soap integrated. I did only one run with the pad, and by the look of things if you were to use something harsher/harder after you’ll arrive at the original polished-but-not-shiny-with-marks-look.
Don’t forget to wash the part in Gunks with thin spiral brushes in all the holes! Otherwise you’ll hear the familiar crunch of glass beads when you tighten your bolts…
Not bad for only a half-hour job…and it could be even better! I just didn’t have the time to play with it any longer.
I was so chuffed about my fork stanchion (see Yamaha RD 350 LC 31K section), That I decided to give my crankcase covers a go. Add to that funds are getting pretty low and you have all the excuses for doing the jobs yourself.
After inspection, I noticed that the original covers I could compare with were clear coated and had ton of scratches behind the clear coat. Not that surprising if you consider these bikes were built on an assembly line: Polishing alloys to a mirror finish takes a wad of time. So I suspect they were polished to a half shine and then clear coated, the coat gives the shinyness.
If you look at the rear fender, you will also notice traces of cost- andd time-cutting: the chrome is only polished on the visible portion, the one that sticks out. Underneath the seat, the fender is real scratchy as in using a disc grinder to make passable before chroming.
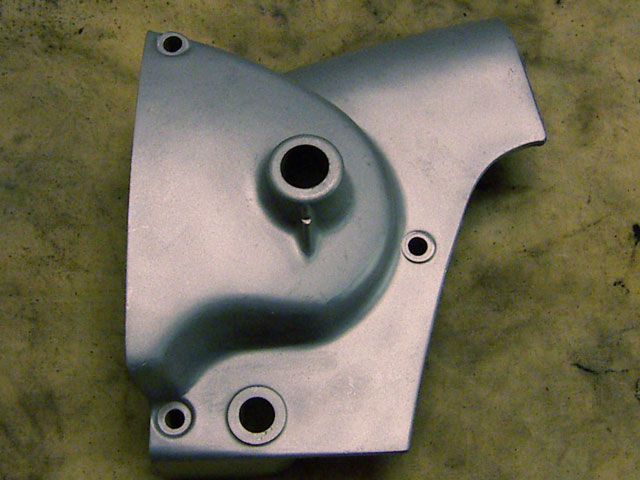
So on to the covers: This is the original clear coated (and slightly yellowing) chaincase cover, complete with corrosion and crows’feet.
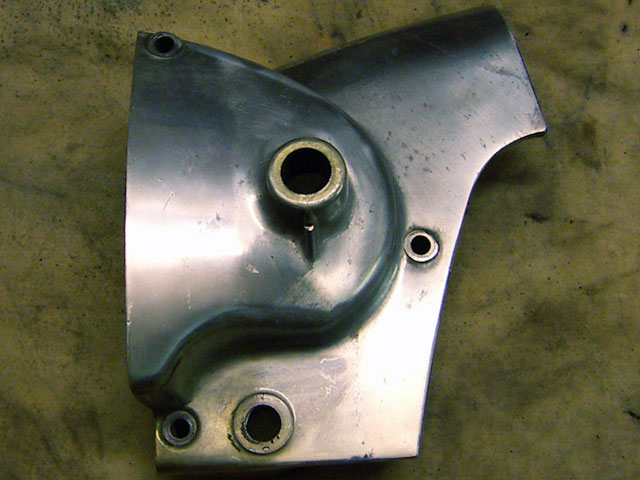
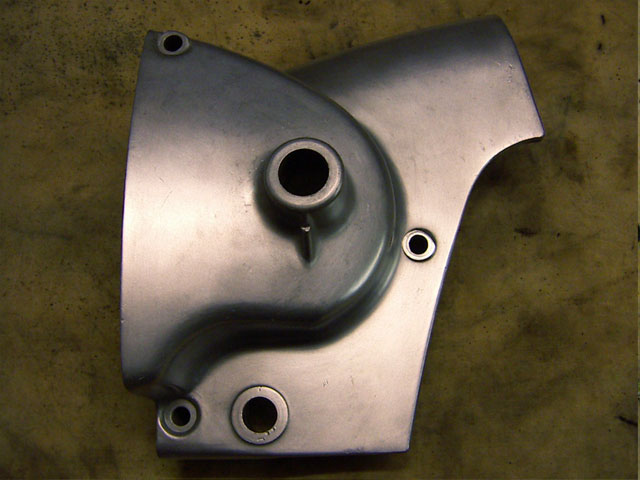
And that’s after hitting hit with the bead blaster, always low ressure (2 bar) and medium sized glass beads.
The surface is now cleaned, but I didn’t remove the few marks that were underneath the crow’s feet. To do that you’d have to attack it with sandpaper and reblast it afterwards. The result is a very even surface.
After that I just take the stell wool pads with soap and give it a rough wash/polish under running water: this removes all the dust and starts the polishing process. It also removes whatever grease is left.
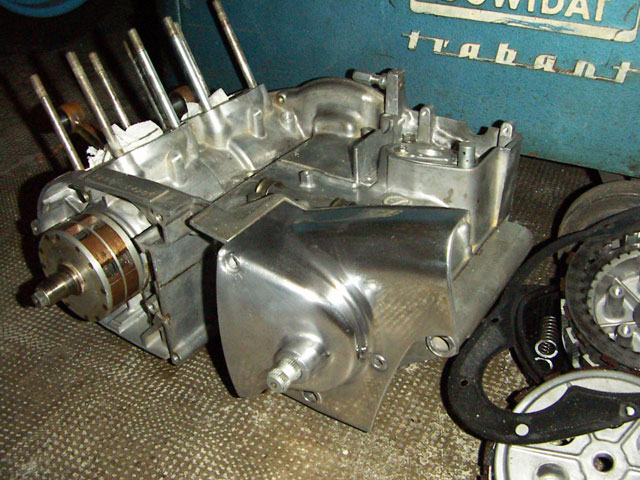
This is notably smoother and ready to be hit with finishing polish, the type that comes in a can, a paste. I use something called “Alu-Magic” but ost other stuff should work. I prefer to advance in small steps as all I want is to get a even COLOR to the cases. I’ writing that a few days after the job and already can’t rember what I did! I think I just took the steewool pads and the polish and did it by hand… or did I hit with the bench machine? Anyway, very pleased with the end result:
People wrongly think bead (as in plastic or glass beads) and sand blasting as an easy way to remove dirt.
It ain’t so: both of these are pretty expensive to buy and can be reused a number of times. Each has their application on vintage motorcycles.
Sand blasting
Insstead of using sand, it is likely your blaster is going to use Aluminium Oxyde (sometimes known as Coryndon), because it can be filtered and reused. It is designed to have multitudes of sharp edges, and usually in the 250 micron region. It is great for removing paint and rust and prepping panels etc for painting. Pressure at the blasting pistol can be up to 4 bar. Parts have to be clean or this will happen:
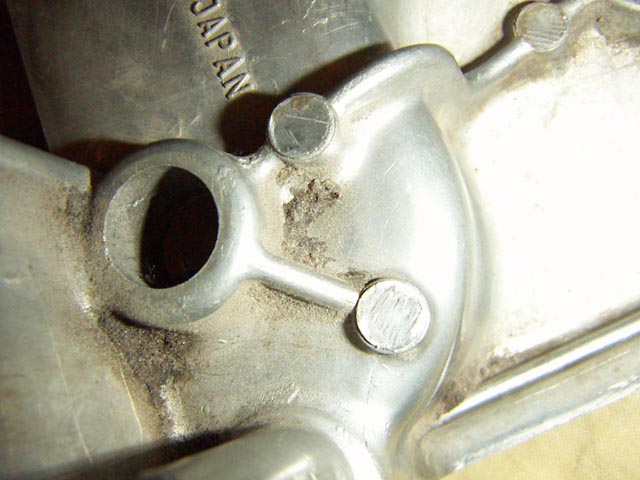
All this stuff will stay in the dirt and grease… not what you want! ot with a motor crankcase.
Bead Blasting
Is really meant as a surface treatment for alloys. The media has a ball-like appearance which make it bounce off the surface giving light polishing action.
It is also has less tendancy to stick to dirt leftover. Have a look at my cylinder head below and compare with the previous post.

Speak for itself.
Glass beads won’t change your surface appearance too much IF you use them as they’re meant to be ie, low pressure (I use 2 bars) and really clean parts.
They will remove corrosion as this flake off when hit by the balls. It’s always better to start with lower pressure and do two passes, instead of strting with higher pressure. It is a much more controllable process with low pressure. Also, if you use high pressure, the beads shatter when they hit the surface and then become abrasive as well as producing a fair amount of dust, neither of which is desirable.
A good example of how fine it can be: Some coin collectors use bead blasting to clean up some veryy corrded coins, but use 0-50my diameter beads and a pressure of 0.5 bars! Check these examples: A Swiss bead blasting company
The absolute best is beads used within a liquid environement, sometimes called Vacaperl or Aquajet. The same company proposes this ervice and have a look at their examples on motors.
Another way of using glass beads is as a prepolish treatment to ensure evenness. More about that later.
Went today with the naked RDLC to the “Expertise”, the local MOT, happens evey second year for a bike that age…
And failed! The rules have changed once again and they didn’t have the limit values for the dics… How smart.
To top that, the rear caliper seized and that’s a no-no. So a new date has been set in two weeks time. Another 50$ down the drain. What’s more, you are now not allowed to do the work yourself and sign for it, neither can a mechanic inspect the work and sign it for you (that was handy when you have mate and do the job yourself)… I really can’t picture myself going to a shop that has never seen me and aske them friendly service info…
With some 20 bikes, I have to do the stuff myself otherwise I’d be totally broke. The web is really closing on self-mechanics and enthousisasts…