« December 2005 | Main | October 2005 »
Monday, November 28, 2005
Pistons needed.
PAul wanted me to send the pistons back, fair enough, but it would just
taake too much time.
I am in a hurry to tighten the heads and be done
with the rebuild.
I met a Swiss gent over the Internet through The
FAM forum (german- and member-only, don't start complaining if you're not
drawing new blood to the scene), Walter Bachmann, who also has a T250,
although a 1972. Sent him the pistons and a few more parts, that
recouped my expenses a bit.
Waiting for the news set from PM.
Friday, November 25, 2005
Another setback
Well PAul did send me the pistons, but they were the wrong size… I need
the last overbore.
When I arrived at the engineers, the pistons went
plop inside the barrels…
Gotta sort that one out before I can
finish this damn motor.
Gotta sort that
Wednesday, November 23, 2005
Paul Miller
IS king of of his realm: I received his set of pistons today, we're
ready to rebore... But am I still waiting for Marcel's parts!
I was
never impressed by the Dutch Post efficiency BUT this is getting unreal.
You can order parts from the USA 5 days later than in Europe and have
them delivered before the Euro parts even appear on your door steps...
Friday, November 18, 2005
Cylinders back from digital hell
Well, these guys finally did quite a good job out of it and for a decent price. I still have to chamfer the ports and then we'll hone the jugs to correct spec. They bored to 3/100 and we need 4 to be safe with standard Yam pistons... except the honer hasn't got long enough stones for the T shaped intake prto of the RD400.. off to find some.
Thursday, November 17, 2005
Finishing Confusion
I just dismantled the rear wheel to advance while waiting for parts to arrive. Sprocket carrier was grotty but, once cleaned, show correct finish for the rest... much shinier than what I thought, even with clear coat on top. So I started stripping the other bits with paint stripper instead of beads, much slower but the ally surface remains untouched... maybe I don't like polishing after all!
Friday, November 11, 2005
Top end worries
Brought the cylinders with pistons to my usual workshop. It was a bit worrying as they suddenly look like they didn't know what to do with it! They don't have a bore machine but will ut it in their big digital center... and finish it with a light 3-stone hone... We'll see next week, but I might have to change shop.. Plus I will have to do the chamfering and cost per cyl is around the 100CHF mark, a 20% increase from last time.
Beadblasting 103
Next day, being very happy with myself, I decided to atack the second
case... the iggy case.
Of course, I couldn't rememebr what I did, so
whent that way:
Clean part
Beadblast
Polished with steel pad (without washing)
Washed with steel pad
Polished by hand with soft cloth
Then rehit
it with steel pad
then rewasahed it...
The bugger hasn't got the same color!
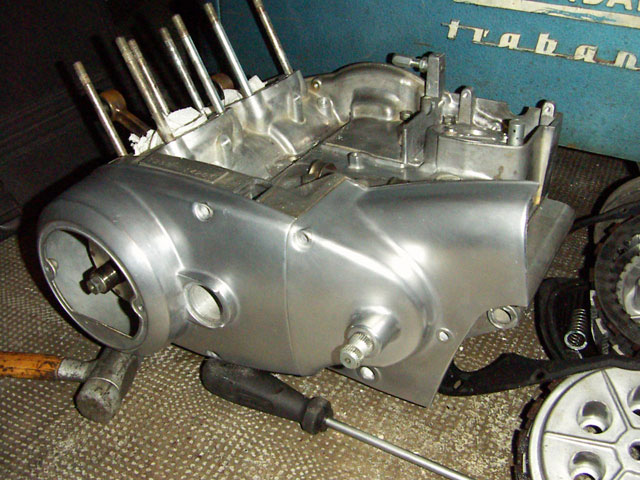
This is the original untouched cover, I'm pretty sure that clearcoating the beadblasted part will get me close to this look.
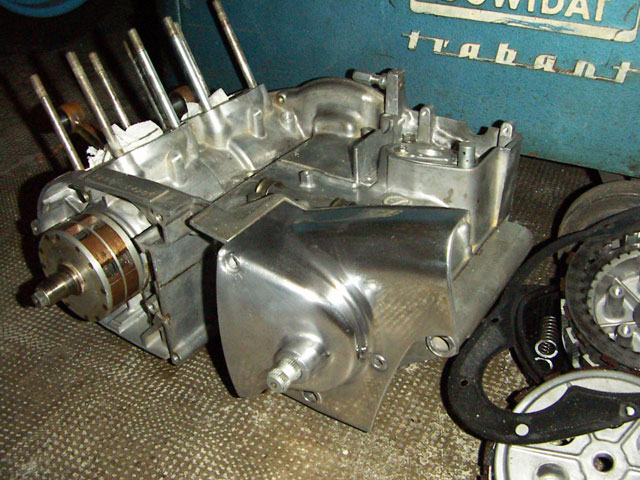
The surface up close. They have the same finish but the colors are different...
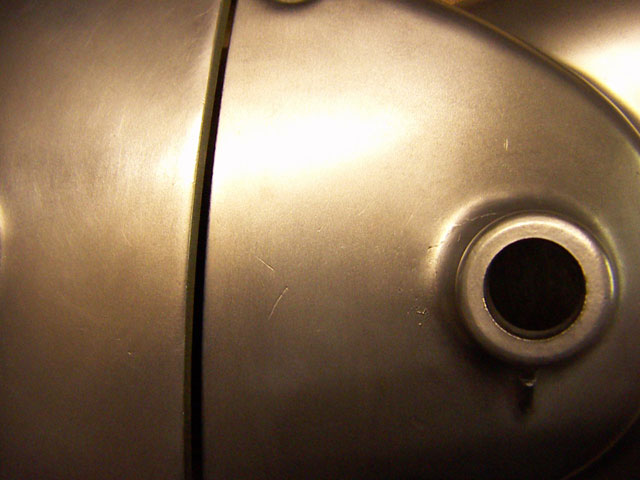
Oh well, there's always tomorrow...
Thursday, November 10, 2005
BeadBlasting 102
I was so chuffed about my fork stanchion (see Yamaha RD 350 LC 31K
section), That I decided to give my crankcase covers a go. Add to that
funds are getting pretty low and you have all the excuses for doing the
jobs yourself.
After inspection, I noticed that the original covers I
could compare with were clear coated and had ton of scratches behind the
clear coat. Not that surprising if you consider these bikes were built
on an assembly line: Polishing alloys to a mirror finish takes a wad of
time. So I suspect they were polished to a half shine and then clear
coated, the coat gives the shinyness.
If you look at the rear fender, you will also notice traces of cost- andd time-cutting: the chrome is only polished on the visible portion, the one that sticks out. Underneath the seat, the fender is real scratchy as in using a disc grinder to make passable before chroming.
So on to the covers: This is the original clear coated (and slightly yellowing) chaincase cover, complete with corrosion and crows'feet.
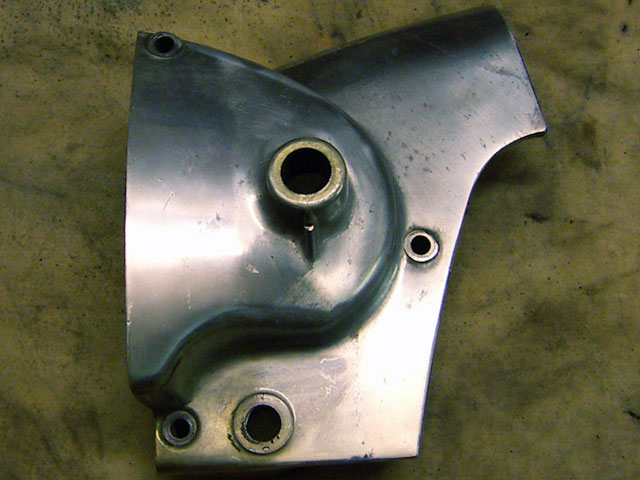
And that's after hitting hit with the bead blaster, always low ressure
(2 bar) and medium sized glass beads.
The surface is now cleaned, but
I didn't remove the few marks that were underneath the crow's feet. To
do that you'd have to attack it with sandpaper and reblast it
afterwards. The result is a very even surface.
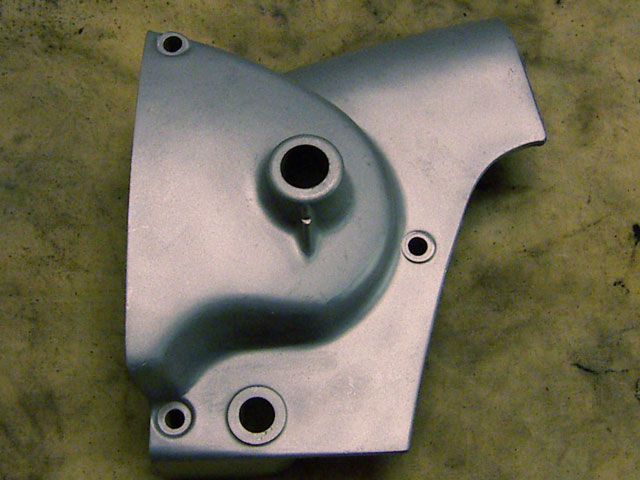
After that I just take the stell wool pads with soap and give it a rough wash/polish under running water: this removes all the dust and starts the polishing process. It also removes whatever grease is left.
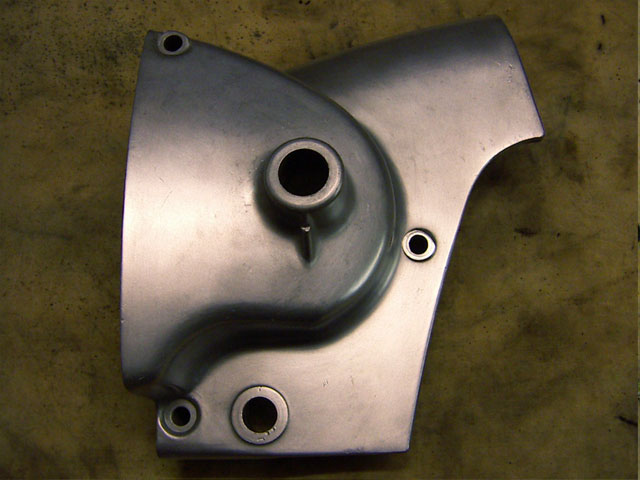
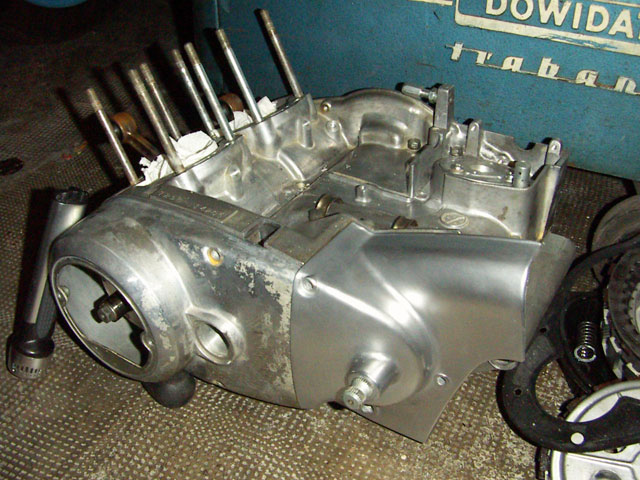
This is notably smoother and ready to be hit with finishing polish, the type that comes in a can, a paste. I use something called "Alu-Magic" but ost other stuff should work. I prefer to advance in small steps as all I want is to get a even COLOR to the cases. I' writing that a few days after the job and already can't rember what I did! I think I just took the steewool pads and the polish and did it by hand... or did I hit with the bench machine? Anyway, very pleased with the end result:
Wednesday, November 09, 2005
Refurbing stanchions
IF, like me, you ride through winter this will certainly happen:
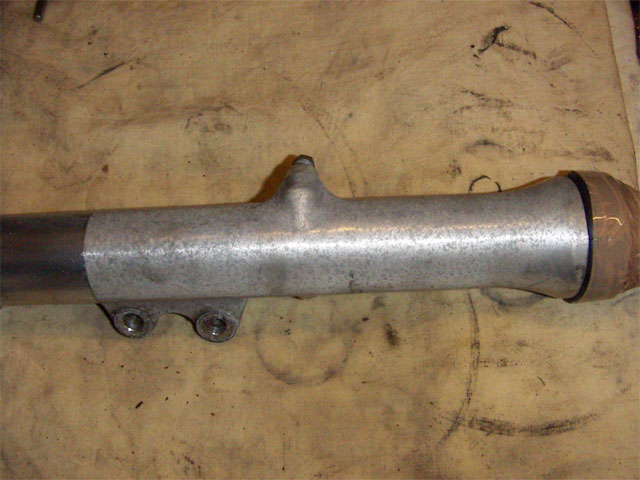
Thanks to the upcoming MOT and a blown forkseal, it was time to tackle the job. Yamaha forksliders have a very specific texture, as if they had been sanded on a lathe. I stopped short of reproducing that, but as you'll see it gets quite close.
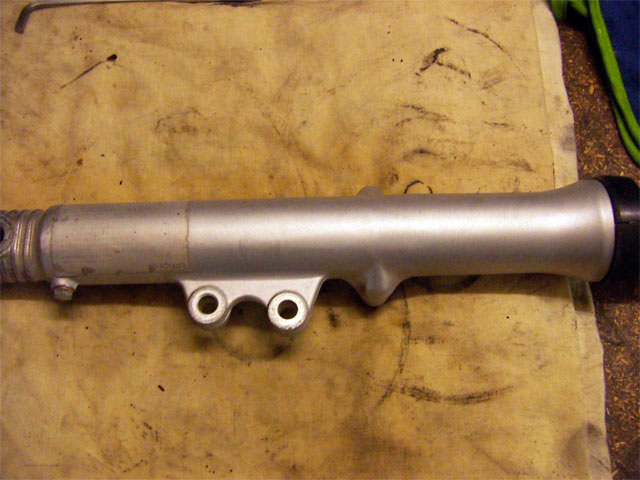
This is after beadblasting with glass beads. You first have to clean the part of all dirt and grease.
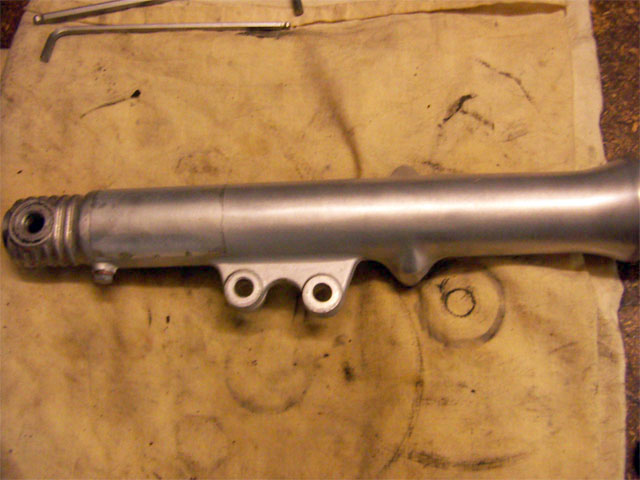
And this after cleaning the beadblasted parts undr running water and
using a steelwool pad. I use one designed for crockery and pots, because
it's got soap integrated. I did only one run with the pad, and by the
look of things if you were to use something harsher/harder after you'll
arrive at the original polished-but-not-shiny-with-marks-look.
Don't
forget to wash the part in Gunks with thin spiral brushes in all the
holes! Otherwise you'll hear the familiar crunch of glass beads when you
tighten your bolts...
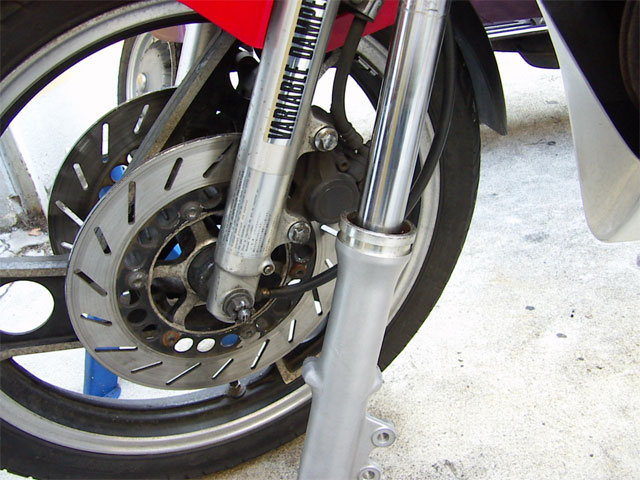
Not bad for only a half-hour job...and it could be even better! I just didn't have the time to play with it any longer.
Edited on: Wednesday, November 09, 2005 11:59 AM
Categories: Yamaha RDLC 350 1UA /31K
Tuesday, November 08, 2005
My good star and and a good start!
Before tearing into the RD motor, I decide to order the necessary stuff, if possible in one place, in order to save a bit of dosh.
Sirus Con Inc, had almost everything I needed. Check this ebay seller: Carb kits, gasket and seal kit, even a manual.
Received all that today. We're set.
Monday, November 07, 2005
Beadblasting 101
People wrongly think bead (as in plastic or glass beads) and sand
blasting as an easy way to remove dirt.
It ain't so: both of these
are pretty expensive to buy and can be reused a number of times. Each
has their application on vintage motorcycles.
Sand blasting
Insstead of using sand, it is likely your
blaster is going to use Aluminium Oxyde (sometimes known as Coryndon),
because it can be filtered and reused. It is designed to have multitudes
of sharp edges, and usually in the 250 micron region. It is great for
removing paint and rust and prepping panels etc for painting. Pressure
at the blasting pistol can be up to 4 bar. Parts have to be clean or
this will happen:
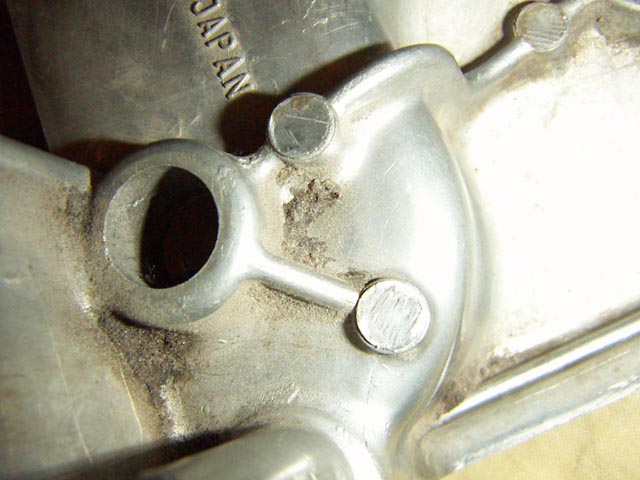
All this stuff will stay in the dirt and grease... not what you want! ot with a motor crankcase.
Bead Blasting
Is really meant as a surface treatment for
alloys. The media has a ball-like appearance which make it bounce off
the surface giving light polishing action.
It is also has less
tendancy to stick to dirt leftover. Have a look at my cylinder head
below and compare with the previous post.
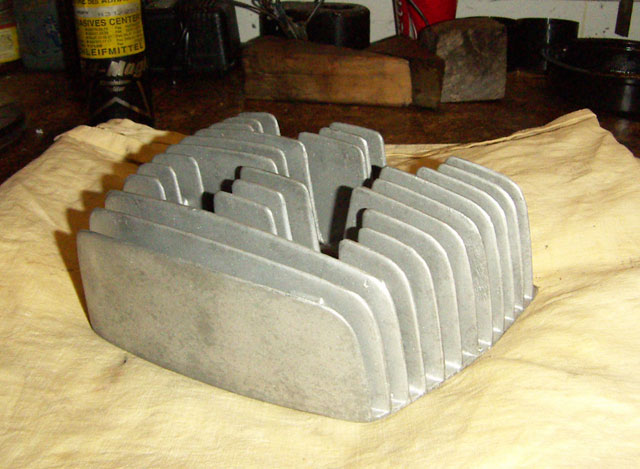
Speak for itself.
Glass beads won't change your surface appearance
too much IF you use them as they're meant to be ie, low pressure (I use
2 bars) and really clean parts.
They will remove corrosion as this
flake off when hit by the balls. It's always better to start with lower
pressure and do two passes, instead of strting with higher pressure. It
is a much more controllable process with low pressure. Also, if you use
high pressure, the beads shatter when they hit the surface and then
become abrasive as well as producing a fair amount of dust, neither of
which is desirable.
A good example of how fine it can be: Some coin
collectors use bead blasting to clean up some veryy corrded coins, but
use 0-50my diameter beads and a pressure of 0.5 bars! Check these
examples: A Swiss
bead blasting company
The absolute best is beads used within a
liquid environement, sometimes called Vacaperl or Aquajet. The same
company proposes this ervice and
have a look at their examples on motors.
Another way of using glass beads is as a prepolish treatment to ensure evenness. More about that later.
Sunday, November 06, 2005
The saga continues... Enter the Beadblaster
Managed to pick up another set of OK heads from my pile-o-stuff, but these are real grotty and corroded
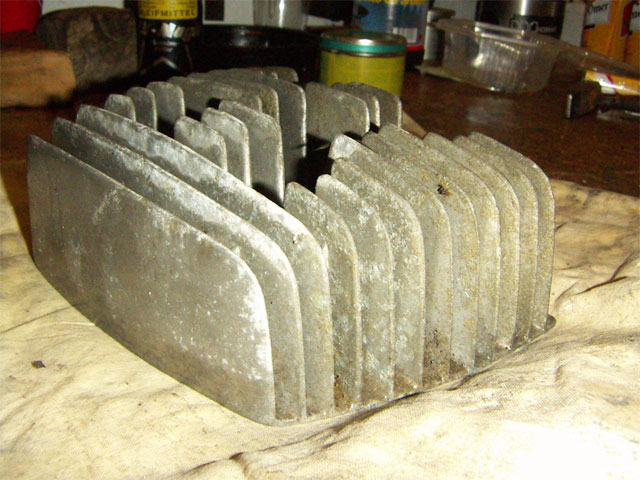
Cleaning them as usual won't remove the corrosion, in fact the picture shows the head after both the general water-based cleaning (for the dirt) and the Gunk cleaning. Time to wake the BeadBlaster up..
Saturday, November 05, 2005
More Headaches
Yeah, people did ride them HARD and to top it off, self "maintenance" was routinely performed by hamfisted mates, paid with the six-pack method. This is a great demonstration of how NOT to rethread your plug coils...

Notice how grotty these heads are, and I spent a good half hour on them.
These were the least corroded of the lot!
I use a strong water based
detergent for ally parts (also for cylinders) as Gunk is pretty
expensive and really meant for degresing stuff not for removing dirts.
The stuff I use is "Cillit BAng!" in powder form, just fill in a plastic bucket, make a good mixture (like 4-5 spoons), put the parts in there, brush them a bit with a toilet or a bottle brush... and come back next day. Rinse them well and let dry before using the Gunk in the parts washing machine.
Friday, November 04, 2005
Teething troubles
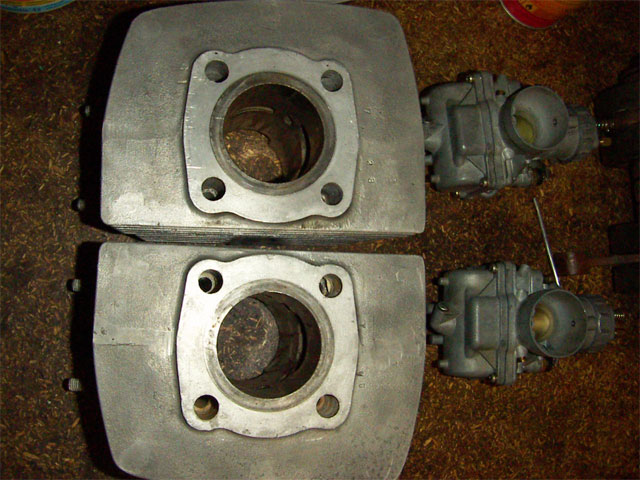
People really drove the T series HARD... out of all the cylinders I have (3sets!) only one has unbroken exhausts spigots. These were usually rewelded, but with so few threads left that i doubt the exhausts sealed at all. Could explain why all my bikes have missing barrels: they probably all seized after the repair.
I will have to use a set of T250 II cylinders with extra exhaust ports, bit more poke and require the use of slightly larger 26mm carbs. These have only been cleaned, not bead blasted. I just need new O-rings for the flanges. I also need to check if the carbs float function properly... just trying to avoid leaks.
Wednesday, November 02, 2005
Time to clean up
Waiting for parts, I turned to cleaning the bike, the chrome really comes back to good condition, with the help of a bit of elbow grease.I used WD40 for all the painted bits, it really works well at removing grime. Don't use it on chrome though, it won't harm it but hen you use Metarex (or Ouator), the greasy film left by wd40 complicates the polishing.Dig that seat, it's got the original foam and cHris Dupen from Vintage Japanese Motorcycle World in Oz is selling replica covers for the 69 year.
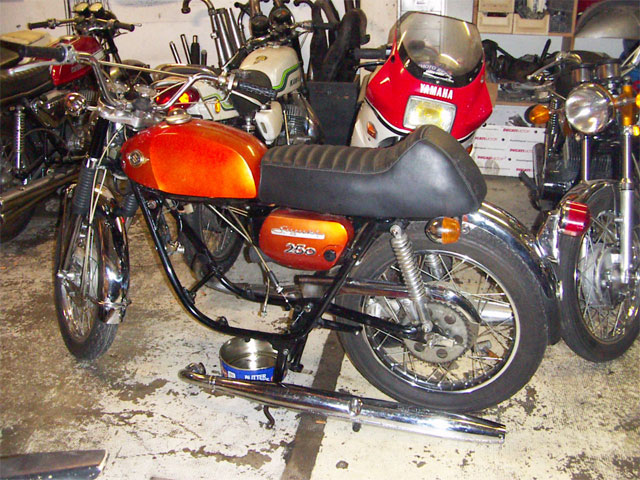
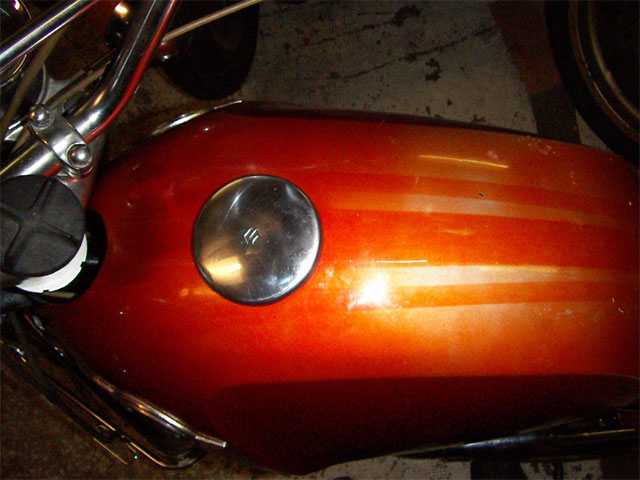
Time to decide if I'm going to use this panel set, the Candy Orange is really a spunky color. The photo looks good, but in truth, it's really faded. By chance, the PO applied some extra stripes, which preserved the original tint.
Tuesday, November 01, 2005
Motor & gearbox sorted
Took me some time to get everything selecting correctly... The T250 box is very fiddly, full of springs and ratchets. Watch out when you open it, things fly out. The setting of the kickstarter gear and pivot is also something, as you have to fit the oil pump shaft and gear before.
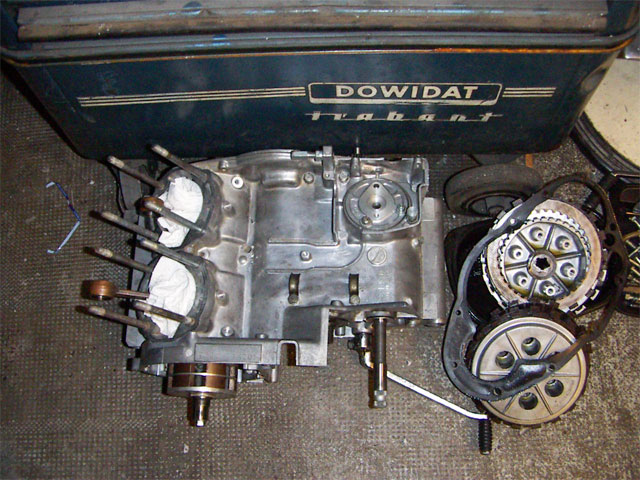
Time to find some pistons, the seals and various motor related parts so
that I can button this one up.
Marcel Vlandeere from
Suzuki T and GT parts in Holland is usually a good source in Europe.